Screen shots are from Ardulink version v0.2.1.20131201and v0.3.1.20140124. So they are very old.
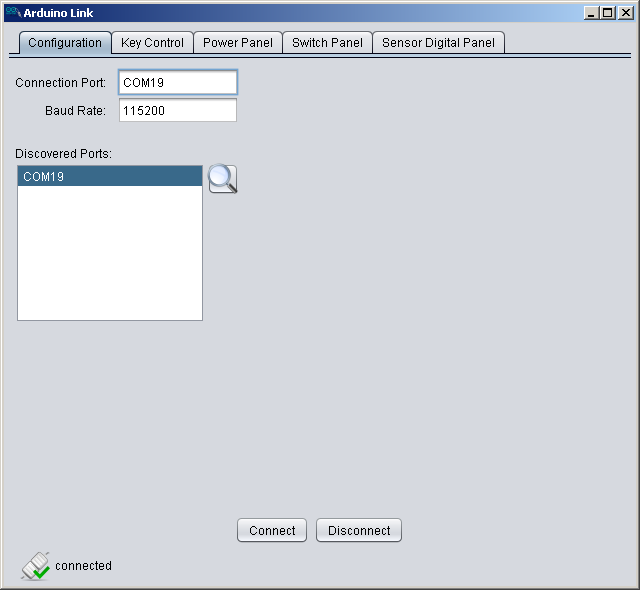
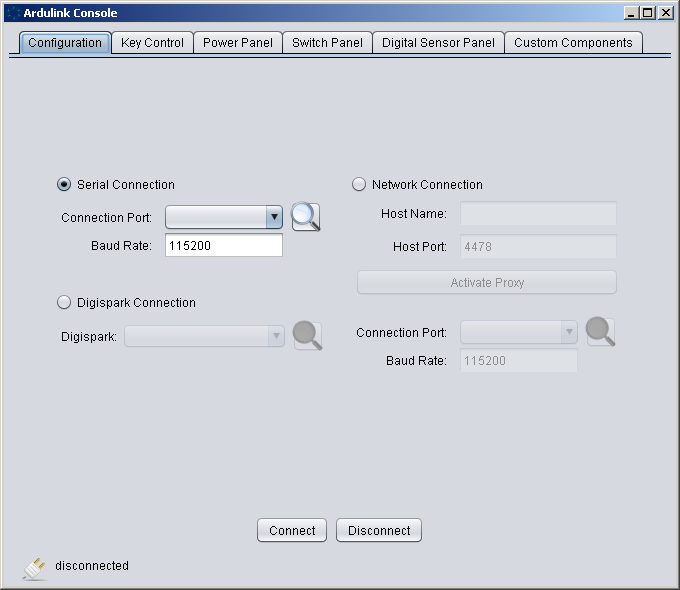
Configuration Tab
The configuration tab contains mainly two components: ConnectionPanel and NetworkProxyConnectionPanel. With ConnectionPanel you can search for available serial ports (USB) on the system, specify the connection port and baud rate.The NetworkProxyConnectionPanel contains a ConnectionPanel and other widgets to allow Ardulink Console connection with Ardulink Network Proxy Connection Server. In the tab then there are two buttons for the connection and disconnection. At the bottom you can see the component ConnectionStatus available on all tabs.
Key Control Tab
The Key Controls tab has just one component. KeyPressController is able to capture key press events. The event is then sent to the Arduino. Of course, the sketch must be written to do specific actions as a result of pressure of specific keys. For example, when you press “a” the sketch can increase the intensity of a PWM pin and decrease the intensity of pin at the pressure of the “s” key. See this video for details: http://www.youtube.com/watch?v=hqe9u7JojpI

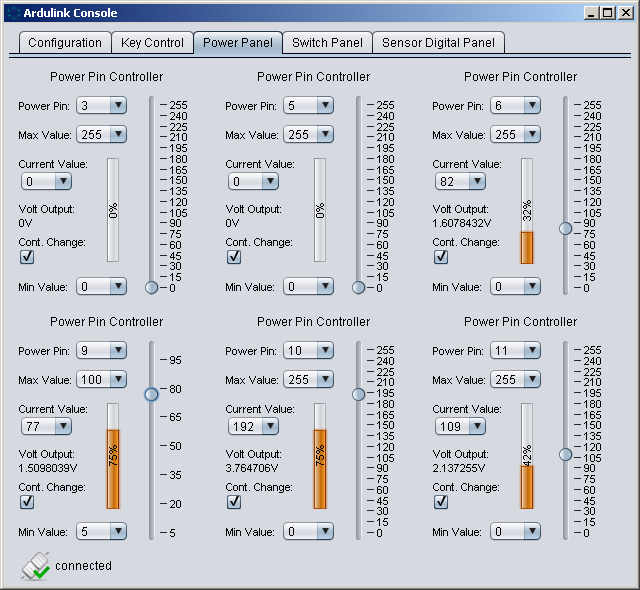
Power Panel Tab
The Console is tailored for Arduino UNO. So this tab has six instances of the component PWMController that is able to drive the PWM pins (analogWrite function). With this component you can set the output power of any PWM pin. You can set the range and see the reference value provided in volts. See this video for details: http://www.youtube.com/watch?v=hqe9u7JojpI
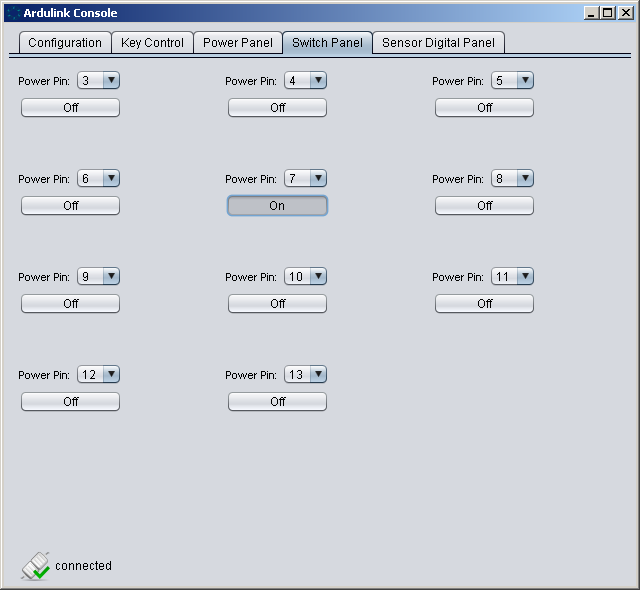
Switch Panel Tab
With this tab you can request to Arduino to perform a digitalWrite function on any pin available.
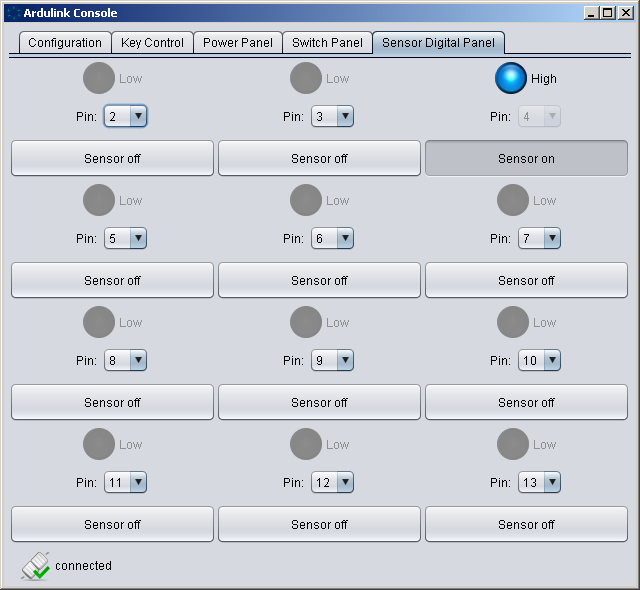
Sensor Digital Panel Tab
This tab has DigitalPinStatus component instances. With this component you can request to listen for a state pin change (digitalRead function returns HIGH or LOW). The status is visible through a virtual blue LED.
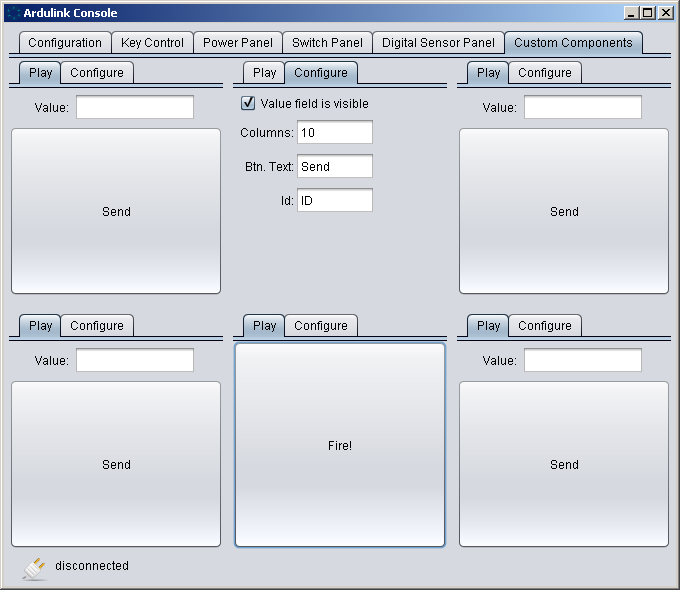
Custom Components Tab
This tab contains a set of ModifiableSignalButton. A ModifiableSignalButton is a wrap for SignalButton. It allows you to modify from the GUI the wrapped SignalButton without use java code. With this component you can send to Arduino boards a custom message.
Hello,
I have already downloaded the Tutorial1 and it worked perfectly. Thanks! So now I am trying to use a PID control for controlling the speed of a DC motor and for that I need to set the percentage of PWM by coding the percentage voltage instead of controlling it manually with the slider as in PWMController. Do u have any tips to help me in this task ?
Thank you in advance.
Ok,
you can follow two ways:
1. if you still want use PWMController you can call programmatically its setValue() method (but it not takes voltage).
2. if you want set voltage you can call link.sendPowerPinIntensity(pin, powerValue); of course powerValue is between 0 and 255. But you can compute it from volt with a simple ratio transform.
powerValue = volt * 255 / 5 = volt * 51
so:
5 volt = 255 powerValue
0 volt = 0 powerValue
1 volt = 51 powerValue